Do you ever feel like you want to produce a beautiful watercolor on your first try? I like painting different versions of the same subject to relax and detach from feeling that I have to get it perfect the first time around.
All my siblings, my parents, and I have a cat living in our homes. I’d like to share with you three different versions of my family’s cats painted in watercolor.
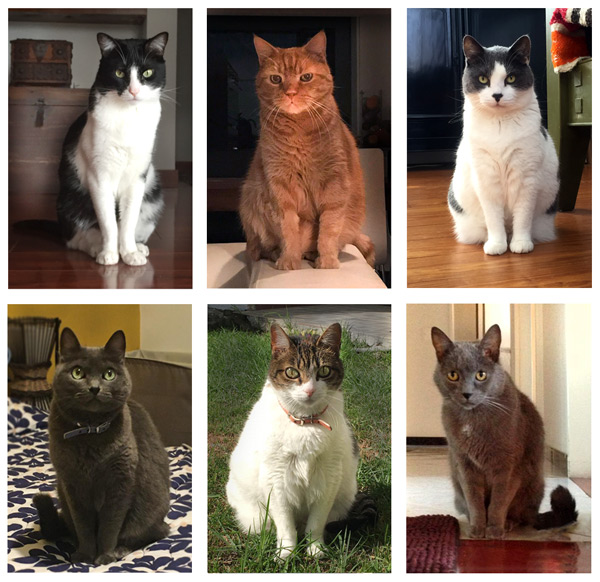
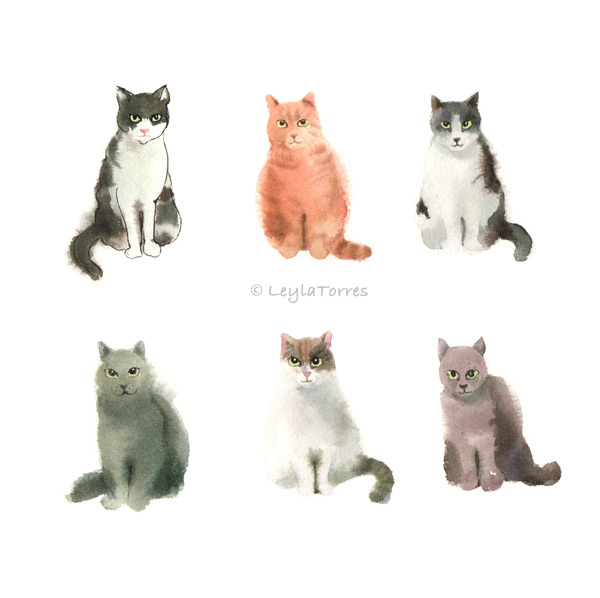
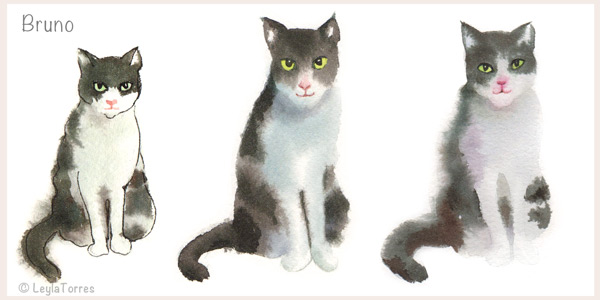
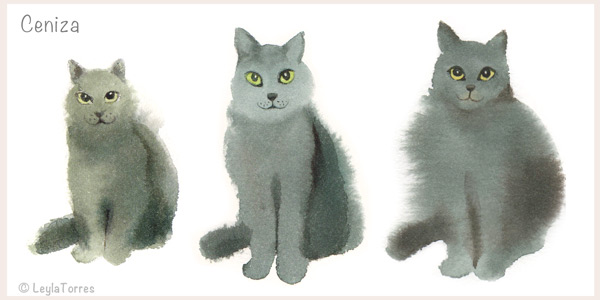
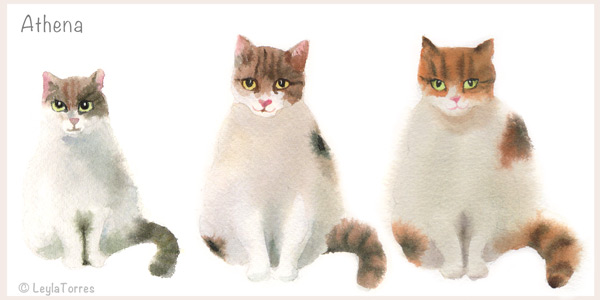
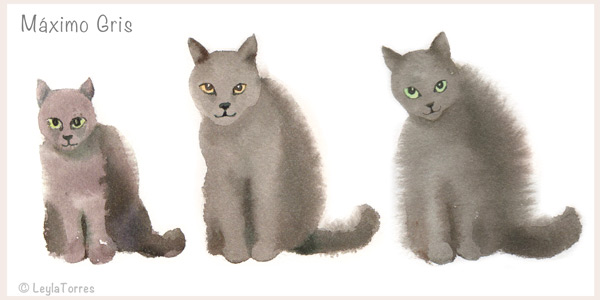
Bottom row: Ceniza (Ash), Athena and Máximo Gris
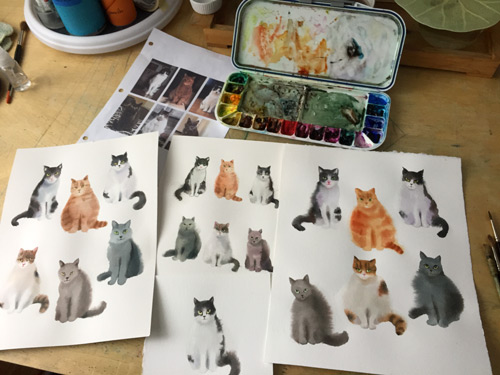
As a reference, I used photographs taken of each cat, all in the same seated position. I wanted to capture the sameness of cats but at the same time the difference in their personalities.
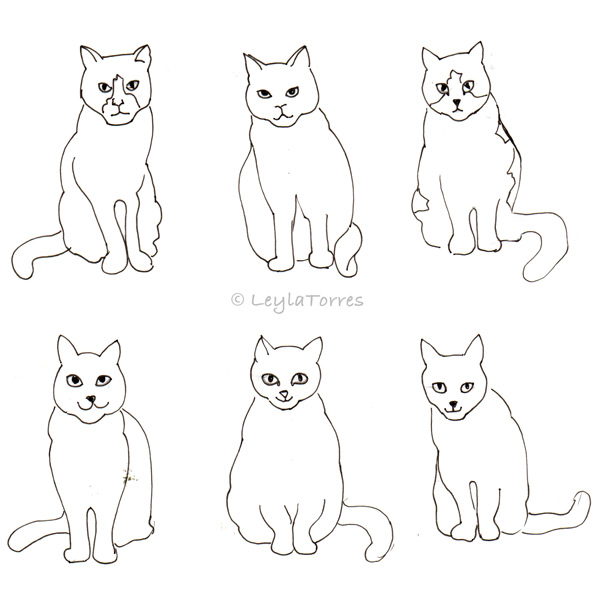
First, I drew the cats, enlarging their eyes a little bit to emphasize one of their main identifying features. Then, I traced these drawings lightly on to Arches watercolor paper.
For my first version, I painted the cats in a smaller size. It was playful and I had fun. After finishing this first version it became clear I should make them bigger.
Also, I didn’t want to outline the cats as I did with the first one.
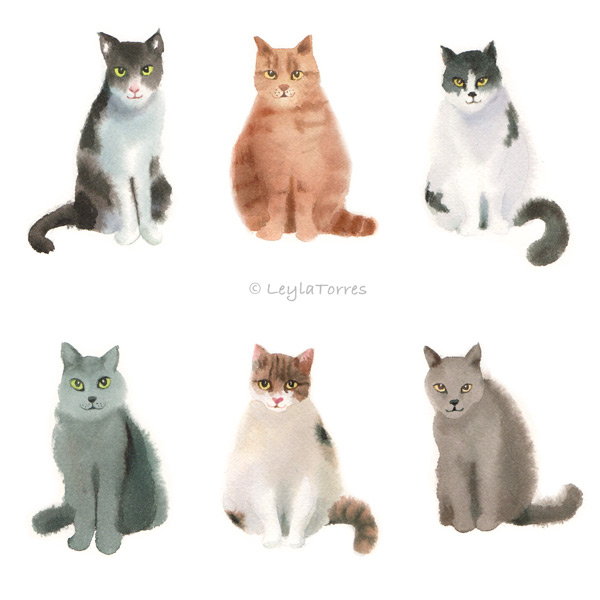
For the second watercolor version of this set of cats, I made them larger.
I wanted to take better advantage of the texture of the watercolor paper to create soft edges and better convey the softness of their fur.
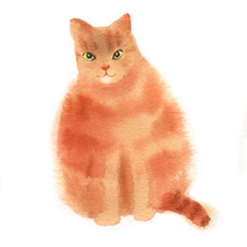
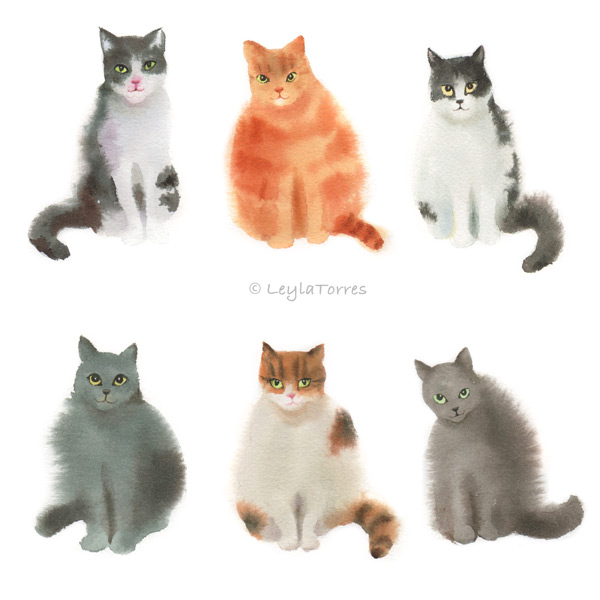
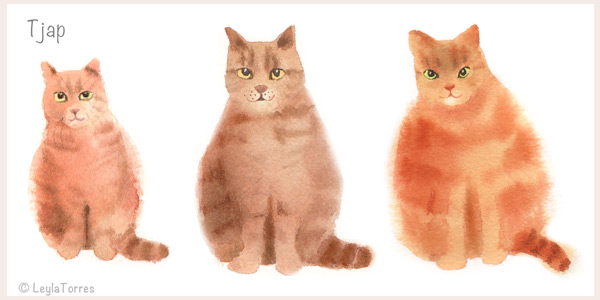
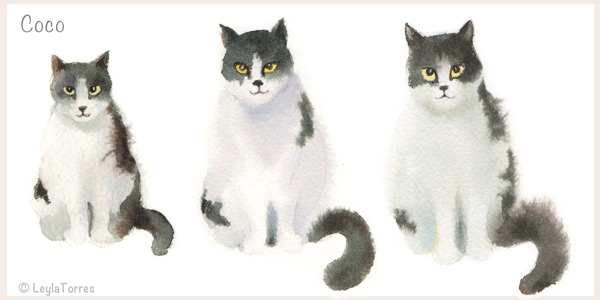
For version number three, I wanted to enhance the feeling of softness by working wet on wet and let the colors blend playfully with the water. Also, I wanted to simplify the process and minimize the number of layers for each cat.
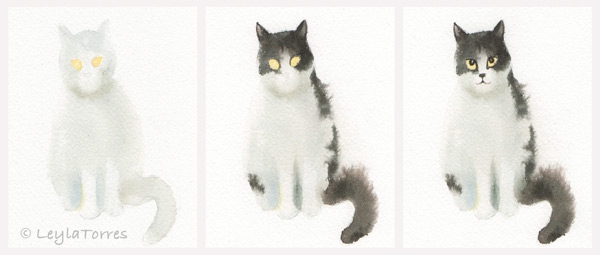
Below, you can see the steps of painting my own Coco, for this third version.
- Layer 1: Wet the paper and apply light tones to define the general shape and create the effect of light and dark. When this is dry, apply yellow for the eyes.
- Layer 2: When layer 1 is bone dry, wet the paper again with clean water. Below the head of the cat, I applied the water beyond the outline of the cat so that the applied color would have a softer edge. The darker tones define the head, tail and right side.
- Layer 3: After it has dried again, add details -Eyes, nose, mouth, and a slight shade to better define the legs.
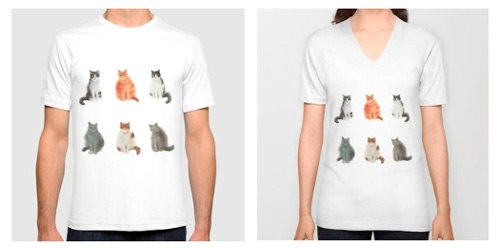
Now the cats are ready to be printed on T-shirts for the family!
Here you can see each version of the cats in watercolor side by side.
The three different versions were helpful in defining shape, style, and confidence in interpreting these cats.
Try making different versions of the same subject so that you approach painting it with relaxation, and a learning and playful spirit!
Your paintings are lovely. The t-shirt of the family cats is such a great idea! Loving your work!
I’m happy you like what you find here, Tamara. Thank you for your warm words!
Thank you for the instruction- I almost have the courage to try watercolor now 🙂
Go ahead and try Heidi. Even if it is not perfect the first time, at least you give yourself a chance to learn and improve!