In another post, I shared a small experiment on painting a rose. In this post, you can see a step-by-step description and photos on painting a new rose.
Any time we paint we are practicing and increasing our potential for making beautiful art.
When you paint a rose, whether you are satisfied with the results of your efforts or not so much, the rose symbolizes your willingness to express something that is valuable to you.
The importance of what we are painting is what it’s teaching us. We establish a dialogue with the paper, with shape, with color.
Through the dedication of precious time and effort, painting your rose is made important by your openness to learning and self-instruction.
Once you’ve finished you can move on to another painting. This can be the same rose seen from a different angle, or under a different light.
Whatever you choose to do, you will paint a different rose. More importantly, by painting as often as possible you give yourself the opportunity to learn something new about painting, and about yourself.
How to Paint a Rose in Watercolor
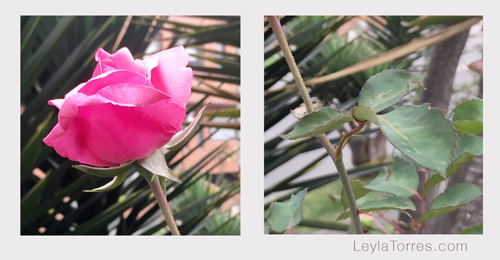
Step 1 I take many reference photos for painting. These photos were taken in Bogotá, Colombia, where roses can be seen growing in many front yards. As you can see, the final rose is a composite of two different photographs: one for the flower itself; one for the leaves.
Step 2 Using the photos as a reference I make a line drawing on a regular piece of paper. When I’m happy with the drawing I scan it, import the scan into Photoshop to rotate and make other adjustments to the image within the format and size of the watercolor paper I plan to use. I then print out the final image design.
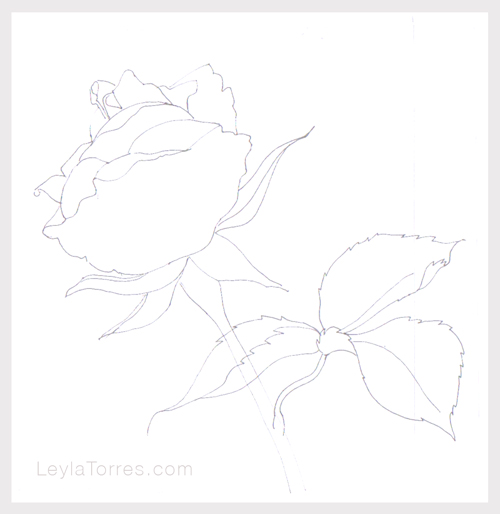
Step 3 I place the printout on a window, put the watercolor paper on top of it, then trace the underlying image onto it using a pencil and drawing a very light line.
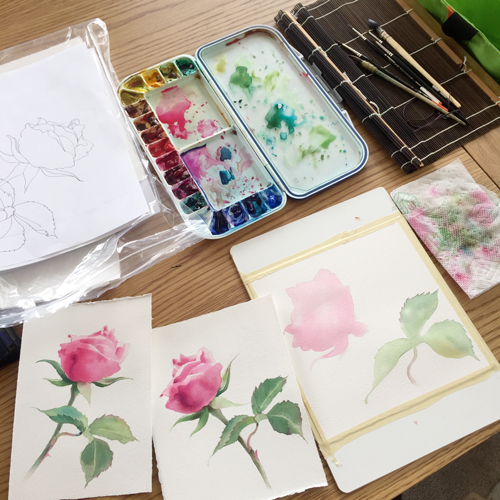
Step 4 To paint a successful watercolor, preparation is crucial. The first thing I do is to mix and prepare enough color on my palette.
In this case, for the flower, I mixed quinacridone rose with a tiny bit of a warm yellow for the petals. For the leaves, I prepared different greens by mixing pthalo blue with a lemon yellow and/or a warm yellow. I touch the green with a little bit of its complementary, red, to tone it down and turn it into a more natural green.
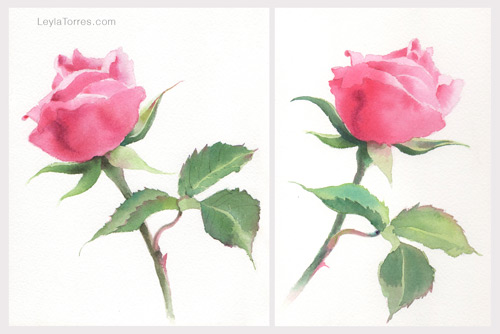
Many times, to relax into painting, I work on two pieces at a time. Doing this, whatever might not go well with one, I can do better on the other. In the following photo, you can see different versions of the same rose.
Step 5 I apply the first layer working wet-on-wet, meaning that first I apply a layer of clean water and when it is still wet, I touch it with the color. The consistency of the paint is diluted, but it is applied more charged with color on the left to begin evoking a sense of volume.

Step 6 The first layer of the leaves is applied, also working wet-on-wet.
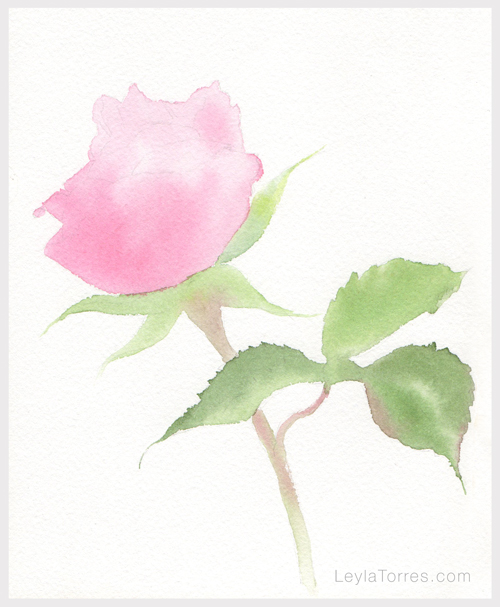
Step 7 I mix the rose color with carmine and a little ultramarine blue to make darker tones. The previous layers are completely dry when I wet the paper with clean water and apply details of shadows to each section of the petals area. The highlights of the rose are left untouched, they show only the first layer of color.
Also, a second layer of green is applied, making sure to suggest the veins by leaving them unpainted. This means that the color of the veins is the green applied on the first layer.
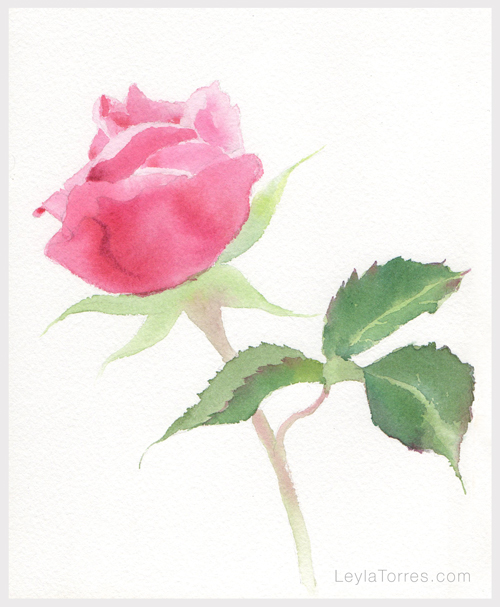
Step 8 The previous layer has to be bone dry. I work mostly wet-on-wet but section by section adding contrast on the leaves and stem.
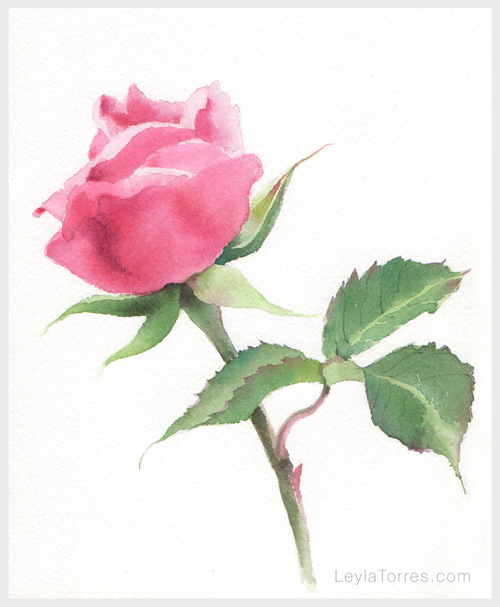
As I mentioned before, many times I work on two versions of the same subject at the same time. Here are the two roses I painted this time. Notice the change of angle within the paper and the different treatment of the leaves. Which of these two do you prefer?
Thanks so much for this tutorial Leyla! It is very clear and helpful. I think I need to use more water when painting flower to keep the softness. I can’t wait to try out your technique!
You are welcome, Suzy! let me know how it goes.
Many thanks for your support. Very best explanation
I’m glad you find it helpful, Isabel.
Dear Leyla thank you for your email and the information contained. Your roses are so beautiful. I like them both but I prefer the one on the left, , it is soft and has beautiful shape in the body of the flower and your shading is wonderful , really makes the flower look three dimensional, the petals are so soft looking and I feel like I could touch them. Thanks again. Isabel
You are very welcome, Isabel. Thank you for sharing your preference with me.
Leyla