Here are steps to paint this pear in watercolor.
Step #1
Left:
Wet the area of the pear shape, except for white highlight. Let red and yellow blend on the paper. Let it dry
Right:
Wet the area of the pear shape. Let a diluted wash of yellow and green blend on the paper. Let dry.
Step #2
Left:
Add a layer of clean water. Let red and green blend on the wet pear shape. Add green to the leaf.
Right:
Add a layer of clean water. Let some brown and green blend at the edge of the wet pear shape.
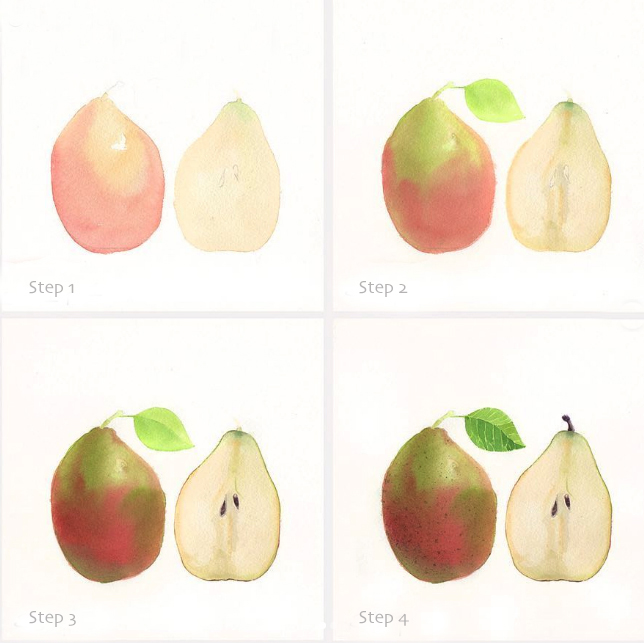
Step #3
Left:
Add a layer of clean water. Let green blend on the wet pear shape. Add green to the leaf, leaving the central vein uncovered. Let it dry.
Right:
Draw a thin line with green and brown around the edge of the wet pear shape. Add dark color to the seeds
Step #4
Left:
Add dots as skin texture. Add green to the leaf, leaving lateral veins unpainted. Let it dry.
Right:
Paint the stem at the top with dark color. Done
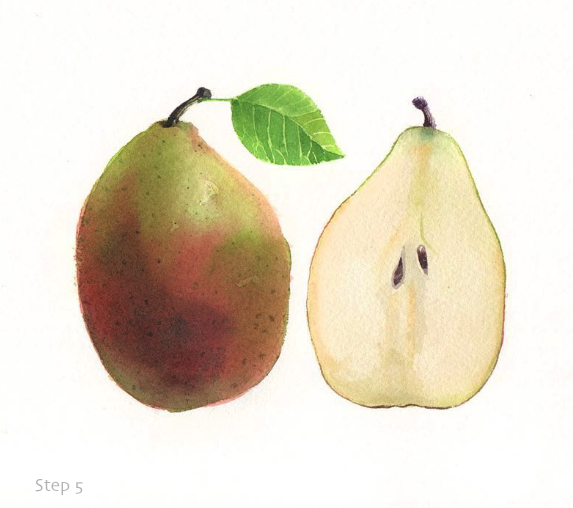
Step #5
Left:
Add a layer of clean water. Prepare brown for shade. Let it blend on the wet pear shape. Add the stem. Done
I’d love to hear how this turns out for you
Thank you!
Leyla
Hi Leyla. I got away from butterflies for awhile and tried the pear. I’m learning a lot about layering colors and being patient! It turned out pretty good. Of course I always think it could be improved, but it’s much better than what I would have produced without your guidance and steps. Thanks!
Hi Kim,
Great that you tried the pear! Patience is our good friend even if some times a little elusive. Hopefully, you share your pear on IG or by all means share it in the Happy Butterflies course page as well. I’d love to see it!